This post may contain affiliate links. Please see my full Disclosure Policy for details.
Decorate your mantel or porch with this easy DIY Rustic Pumpkin Stand and fill the box with colorful decor or bags of candy for trick-or-treaters!
Last week I saw this adorable Rustic Pumpkin Stand project in my news feed on Facebook. Home Depot was hosting a monthly “Do-It-Herself” demonstration and it was on a night I was free, so I decided to go. I have never been to one of those DIH nights so I didn’t know what to expect. There wasn’t much information online so I just registered and showed up at my local Home Depot. When I got there, the lumber aisle was packed with 50 women standing around plywood tables and ready to work!
DIY Rustic Pumpkin Stand Supplies
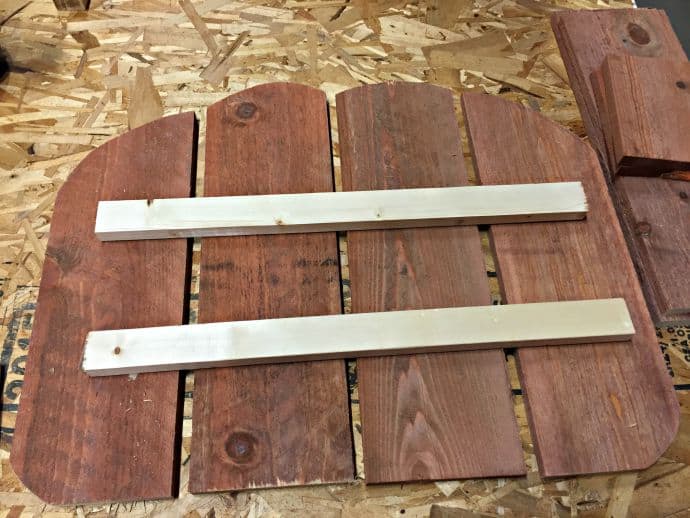
- fence pickets-roughly cut to (4) 18″ slats and shaped on top and bottom to resemble a pumpkin
- fence picket-cut for the box into (1) 17″ piece, (2) 5 1/2″ pieces and (1) 16″ piece
- 1×2 cut into (2) 20″ pieces for braces and (1) 8″ piece for the stem.
- wood glue, hammer and nails, drill and screws, 1″ staples….whatever tool you choose!
- paints
We were given four fence posts cut in a general “pumpkiny” shape. 🙂 You could easily do this at home with fence pickets and a jigsaw. There was also another fence picket cut into 1 – 17” long piece, 2 – 5 1/2” long pieces, and 1 – 16” long piece. These were for the box on the front of the pumpkin. I lined up the fence pieces and used a 1×2 cut into 2 – 20” pieces for the braces and 1 – 8” long piece for the stem. The group was so large that we were a bit short on tools, so I simply used a drill to screw the braces in place.
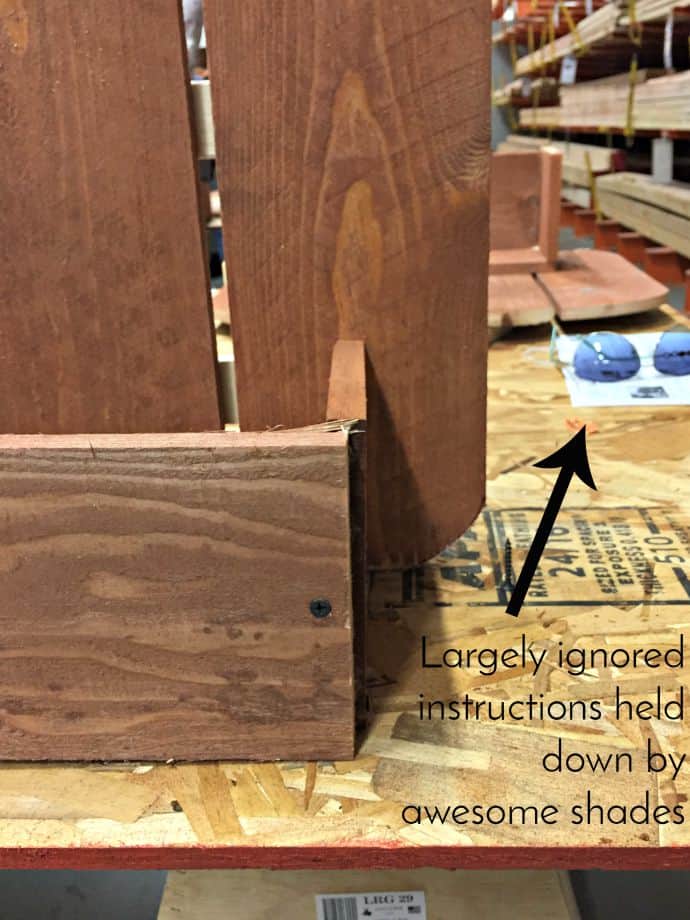
The poor guy cutting the pieces was not quite prepared for the mass of women descending upon him. 🙂 He cut as fast as he could, but several of us ended up with some unevenly cut pieces. I lined my box up as well as I could and then drilled it together. It wasn’t pretty finish work, but hey, it’s supposed to be rustic, right? 😉
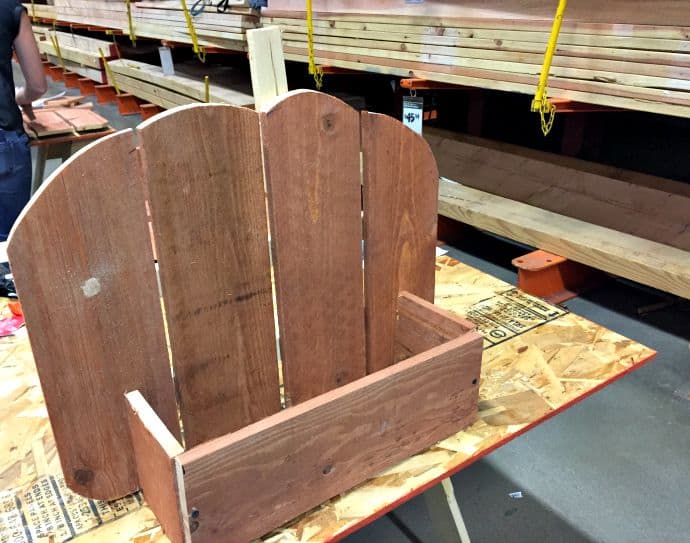
Here it is before painting. The box is attached by (yes, you guessed it…) more screws drilled in from the back. The stem in this picture split when I was screwing it in, but I was able to get another one and it went on without splitting. At first it isn’t much to look at, but the best part is when you get to color! 🙂
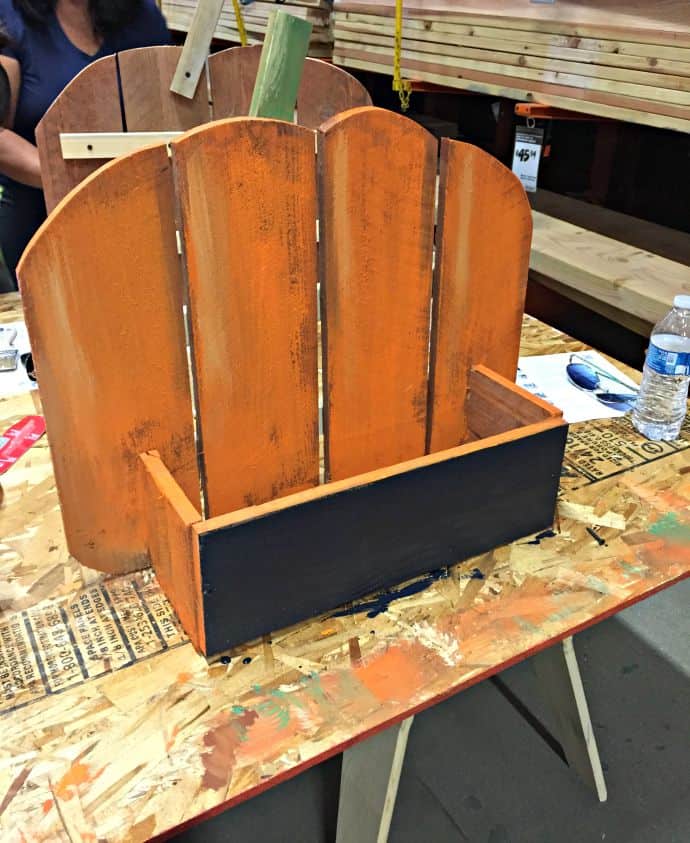
I mixed orange and yellow and then brushed it on unevenly on purpose. I wanted to keep up the rustic theme and the fence posts don’t paint smoothly anyway. Then I brushed on some brown and creme along the edges to give it a little depth and shape. The black paint on the front of the box is chalkboard paint.
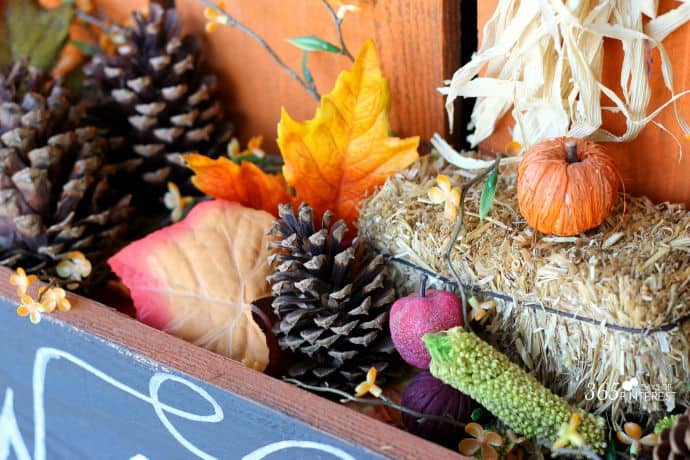
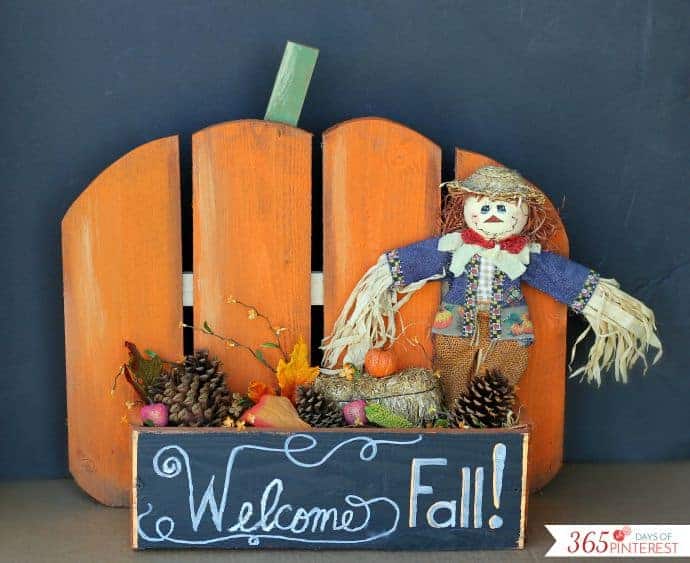
When I got the pumpkin stand home I put together a pretty little vignette to fill the box. I added a scarecrow, some pine cones, leaves and other touches of orange and red.
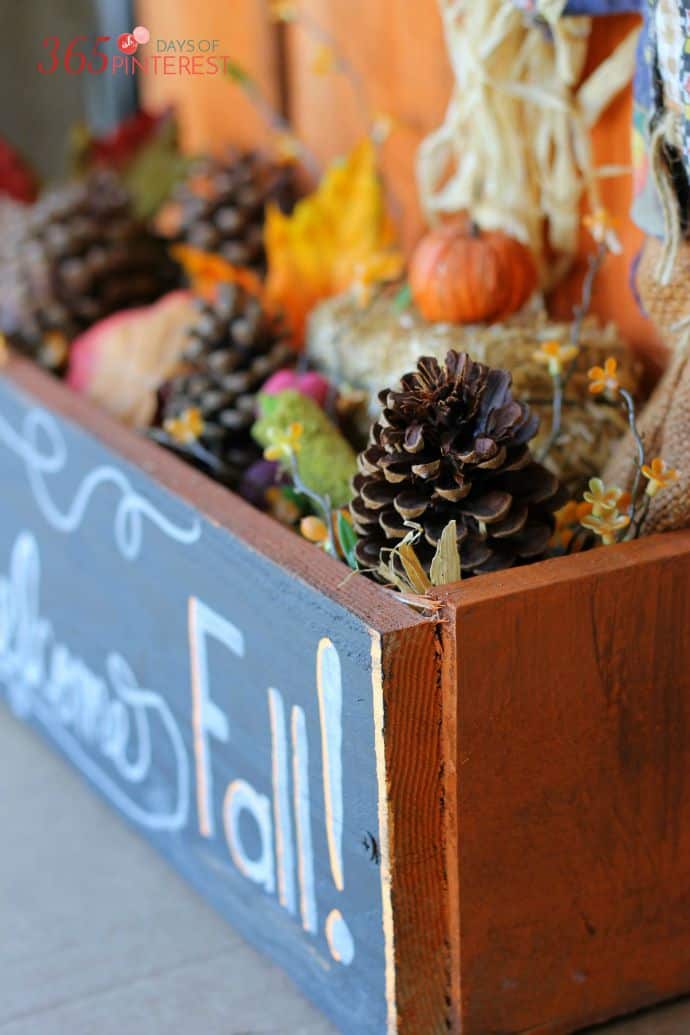
I used some chalk pens to add “Welcome Fall” to the chalkboard front and put it up on my mantel for now. When we are out trick-or-treating with the kids on Halloween, I’ll put it out on the porch and fill the box with candy for the kids who come by when we are gone.
I have to say, this was a very easy DIY project. Of course, it was probably easy because Home Depot did all the heavy lifting for me. I love making a mess and then leaving it for someone else to clean up. 🙂 Just a word of warning- I know several other locations that only had a “demonstration” of this project and the attendees didn’t get to make anything there in the store. If you attend a demo, you have to buy your own supplies and go home to do it yourself. Just be sure to call your local store before you go so you aren’t disappointed. I was pleasantly surprised when I walked out the door an hour later with a finished project that didn’t cost me a dime! Here’s hoping for a fun Christmas DIY next time!
Like my Rustic Pumpkin Stand? Check out these other great ideas for fall!

- Cookie Sticks - June 11, 2026
- Parmesan Chicken and Rice: one pot recipe - May 5, 2026
- Blueberry Upside Down Cake - March 24, 2026
Lori says
Thanks for this! I have seen them advertised but have only made it to the kids one. Your project looks great! I think I’m going to make one for a fall themed baby shower I’m doing.